
Jocker IPTV is a subscription-based IPTV service provider with over hundreds of thousands of channels, VOD, EPG, and more. It also has a lot of movies, TV shows, and more in its content library. You can stream the live TV channels in good quality 1080p or 4K. It supports direct recording and external players like VLC, MX Player, etc. It consists of channels mostly in Arabic languages. The channels are divided into categories like Music, Lifestyle, Entertainment, News, Sports, and more. It is compatible with Android, Firestick, Smart TV, and more.
Why Use VPN with Jocker IPTV
Since most IPTVs are not legal, we use VPNs to protect our data and privacy. As IPTVs are considered illegal in some countries, they are blocked. We can use VPN to unlock these geo-restrictions and stream the IPTV in these countries. It also helps us hide our IP address and location from hackers or other threats online. You can remain anonymous when streaming IPTV if you have premium VPN services.
How to Sign Up for Jocker IPTV
1. Launch the browser from your smartphone or PC.
2. Enter Jocker IPTV on the search bar and choose the official website from the search results.
3. Scroll down to the Subscription section. Select the Plan of your choice and click on Buy Now.
4. Follow the on-screen instructions and finish the subscription process.
5. Once you subscribe to the IPTV, you will receive all the necessary details via mail.
How to Install Jocker IPTV Apk on Android
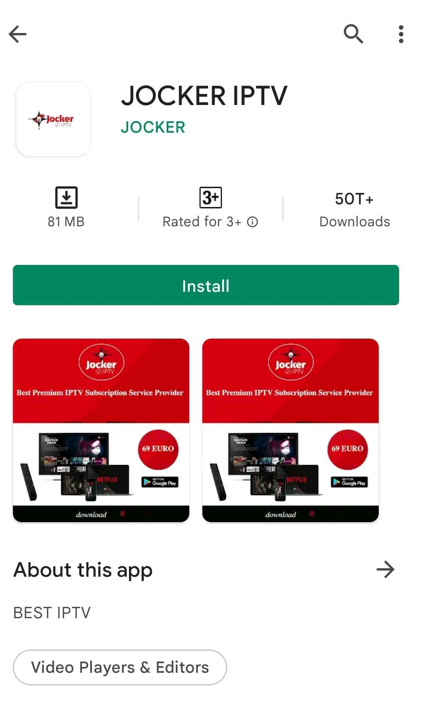
1. Power on your Android device and select Play Store.
2. Enter Jocker IPTV on the search bar and choose the app from the search results.
3. Select Install on the app info screen of the Play Store and wait for the installation to finish.
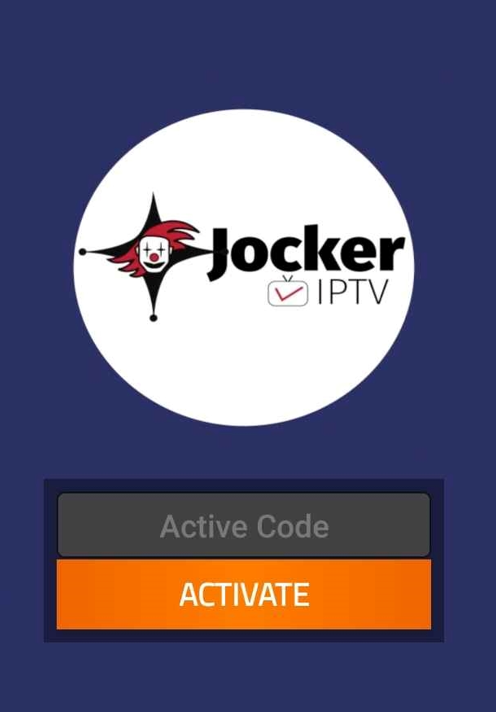
4. Open the IPTV app. Enter the Activation Code and select Activate.
5. Enjoy streaming the content available on the IPTV.
How to Download Jocker IPTV on Firestick
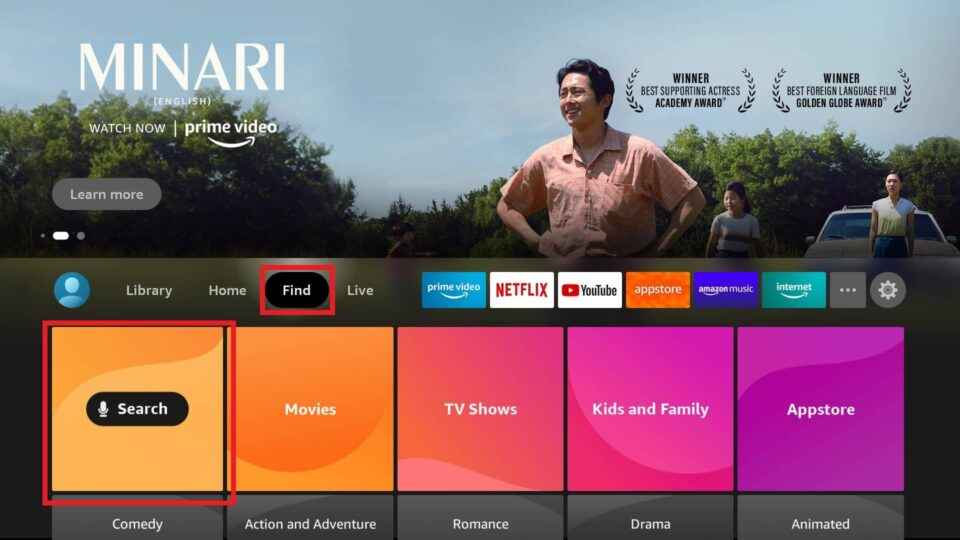
1. Launch your Firestick device and on the home screen, select the Find tab.
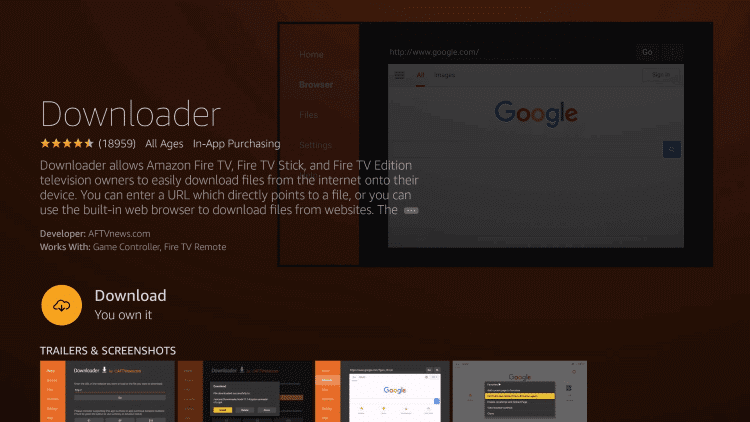
2. Click on Search and enter Downloader on the search bar using the on-screen keyboard.
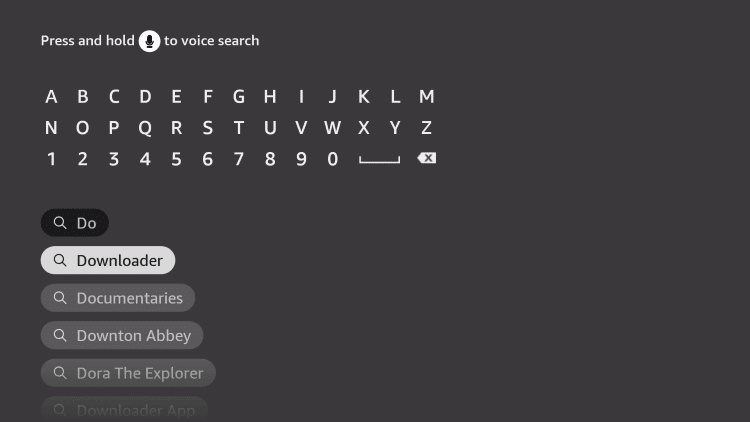
3. From the suggestion list, choose the app and select Download to install the app on your Firestick.
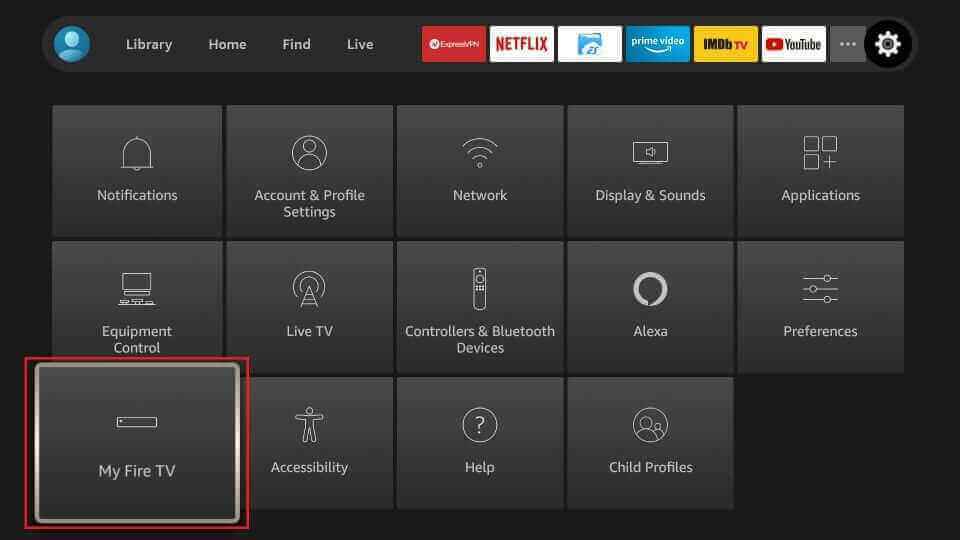
4. Go back to the Fire TV home screen and select Settings.
5. Select My Fire TV and click on Developer Options.
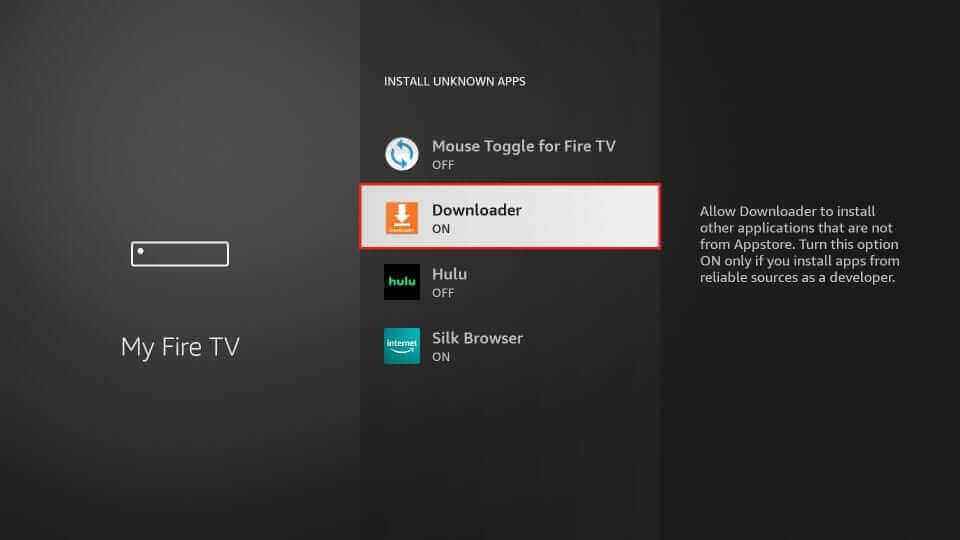
6. Click on Install Unknown apps and choose the Downloader app.
7. Turn on the toggle on the Downloader app so that you can install apps from unknown sources.
8. Open the Downloader app and enter the URL of the Jocker IPTV apk on the URL box.
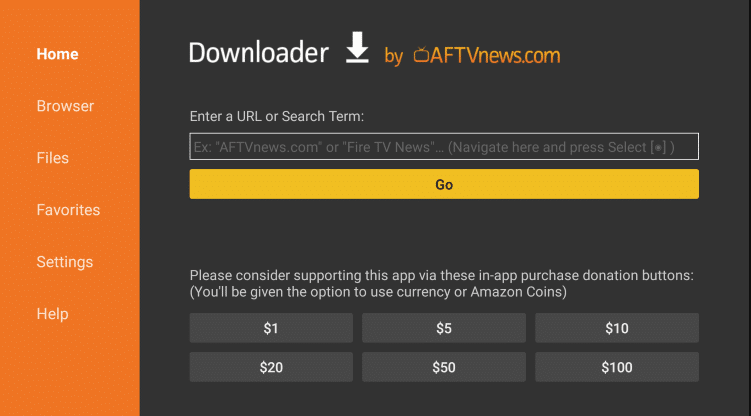
9. Click on Go, and the app will be downloaded on your device. Select Install.
10. Once the installation is done, launch the IPTV app.
11. Sign in using your IPTV account details and start streaming your favorite content.
How to Stream Jocker IPTV Apk on Android Smart TV
1. Select the browser on your PC and enter the Jocker IPTV apk on the search bar.
2. Choose a trusted website and select Download to download the IPTV apk file on your PC.
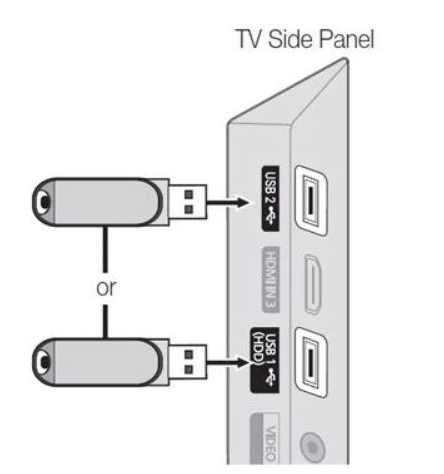
3. Connect a USB drive to your PC and move the apk file to the drive.
4. Disconnect the USB from the PC and connect it to the USB port on your Smart TV.
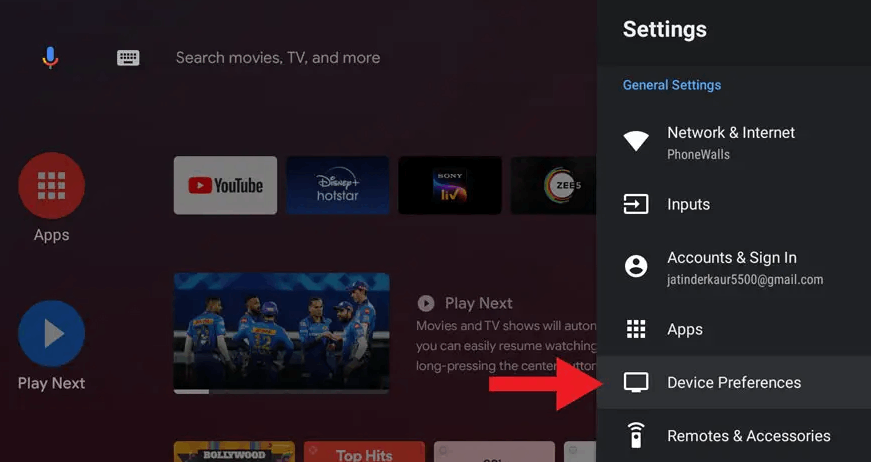
5. Select Settings and click on Device Preferences on your Smart TV.
6. Click on Security & Restrictions and select Unknown Sources.
7. Enable it so that you can install apps from unknown sources.
8. Move the Jocker IPTV apk file to your Smart TV and open the apk file.
9. Click on the Install button and wait for the installation to finish.
10. Open the IPTV app and type in your IPTV credentials to sign in.
11. Choose the content you want and start streaming the IPTV title on your TV.
How to Install Jocker IPTV on Windows and Mac PC
1. Turn on your PC, and on the home screen, choose the browser.
2. Click on the search bar and enter BlueStacks. Choose the official website from the search results.
3. Select Download to download the android emulator on your PC.
4. Open the BlueStacks apk file and select Install. Wait for the emulator installation to finish. With that, you shall launch the BlueStacks app.
5. Sign in using your Google Account and select Play Store.
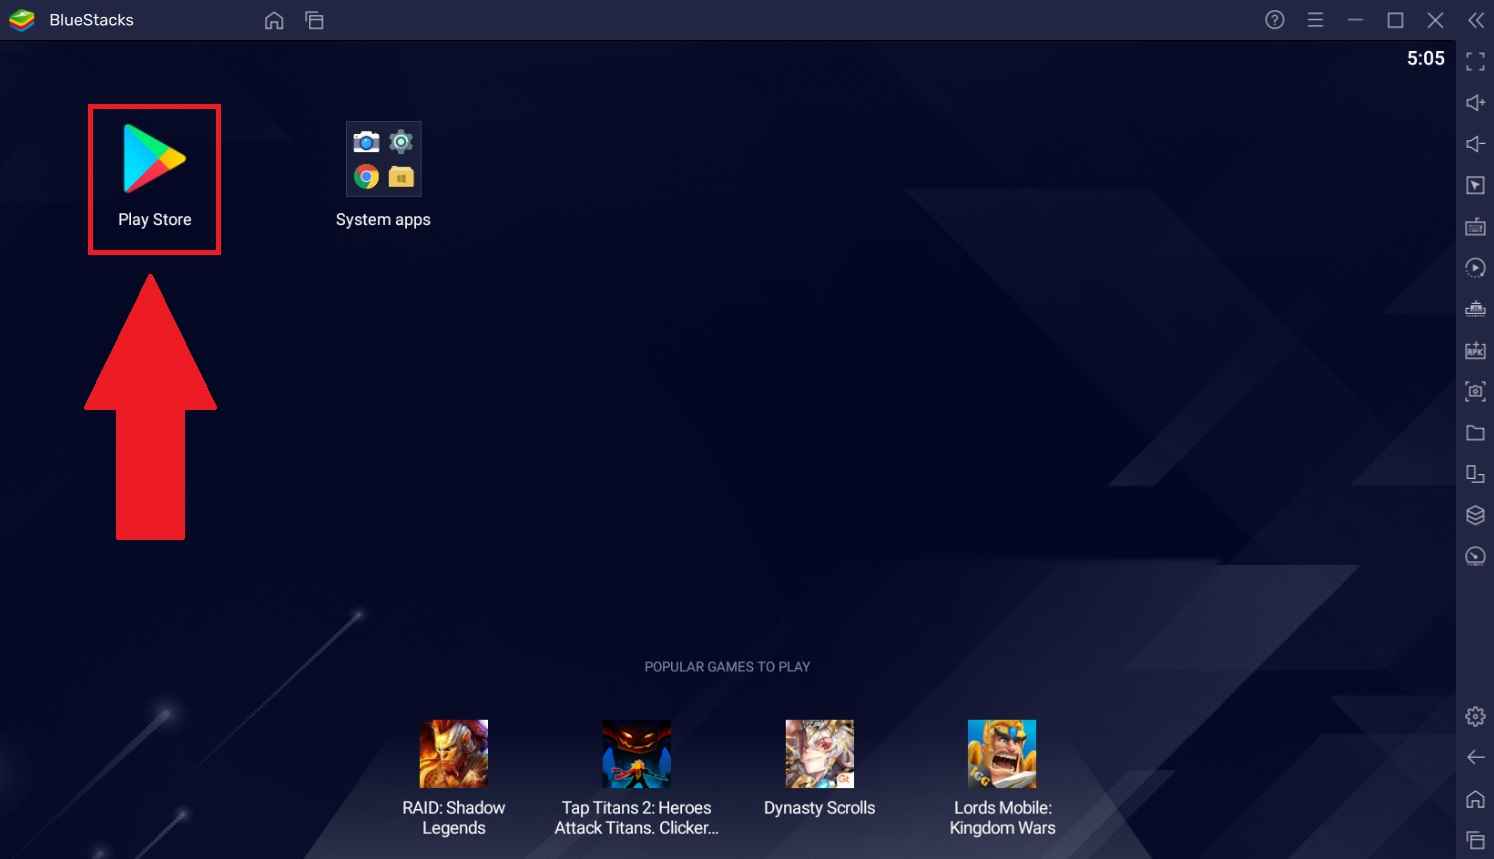
6. Enter Jocker IPTV on the search bar and choose the app from the suggestion list.
7. Select Install to install the app on BlueStacks.
8. Launch the IPTV app and log in using the IPTV account.
9. Enjoy streaming the content available on the IPTV.
Customer Support
In case your IPTV is not working, you can contact customer support to help solve your problem. You can contact them through the Contact Us form available on the official website, and you will receive a reply within 2-3 business days with the solution to solve your problem. You can also try troubleshooting methods like checking your internet connection, restarting your device, uninstalling and reinstalling the IPTV app on your device, and Clear Cache data.
Review
Jocker IPTV is an IPTV provider that requires a subscription to stream its content. It has a good number of channels, and you can also stream them in good quality. If you are from the Arabian region or prefer streaming Arabic language titles, then this IPTV is the one for you. You can stream the content you like and have a wonderful experience. You can also try other IPTV service providers like No Limit IPTV or Ping IPTV.
Frequently Asked Questions
The website of the IPTV may experience a downside when there is any maintenance work.
If the IPTV doesn’t work, you shall need to check for the internet connection and check if the website is working.